So the hard part is done and the decision has been made: we’re going to make the big step! The rest is just wrapping up a few loose ends and getting on a plane, right?
Right…
Sounds easy enough, until you start thinking about all these loose ends to tie up and start asking questions like:
- What about the house?
- What about the car?
- How will schooling work for the kids?
- What about the visas?
- …
Not to mention all the stuff you’ll need to get done once you’ve actually arrived in Australia.
And suddenly you find a yourself facing a huge list of things to consider and a lot more to be done and it can easily become quite overwhelming. Which is when we started using OneNote to get everything a bit more organised and in line.
Below I’ll give a quick introduction into this free tool from Microsoft and why I think it works so well.
As they say: “Even the longest journey starts with a single step.”
Getting OneNote
If you are running Windows 10, chances are, you already have and know OneNote. The app is built in. However, this is a limited version as compared to the full version available from the Microsoft website. Just download the version for desktop.
Creating a Notebook
 The first step is to create a Notebook. I have chosen to create it on OneDrive, which is free if you have a Microsoft account. (And, if you’re running Windows 10, you probably already have one.) This allowed me to share the Notebook across several PCs and laptops, and across locations. So that if I had an idea at work, I could quickly jot it down and my wife could immediately see it.
You see, when you share a Notebook, you can work on it with multiple people at the same time and it gets synchronised automatically. Makes working together really easy.
Oh, and there is also a mobile version of OneNote, meaning that all of the above also works on your phone or tablet.
Getting ready
 The next step was to set up two tabs, one for Europe and one for Australia. This was detailed enough for us, but of course, you can go as “crasy” as you want. You can even create groups of tabs, adding an extra layer of grouping.
Staring your plan
 Now that we’re all set up, it’s time for a brainstorm session. So, make some tea/coffee or open up a bottle of wine (whatever your preference 🙂 ), flip open the laptop and start jotting down things.
When you type text anywhere on the page, OneNote will create a text box around it. Very handy, as you can drag them anywhere on the page like regular sticky notes.
When we did our session, we actually did two: one for the things to to/decide in Europe and another one for Australia. But, of course, if something pops up that you don’t want to forget, you can simply switch tabs.
If you are familiar with the concept of a Mind Map, this should look slightly familiar, if not quite a visually pleasing. But it’s easy and quick to use.
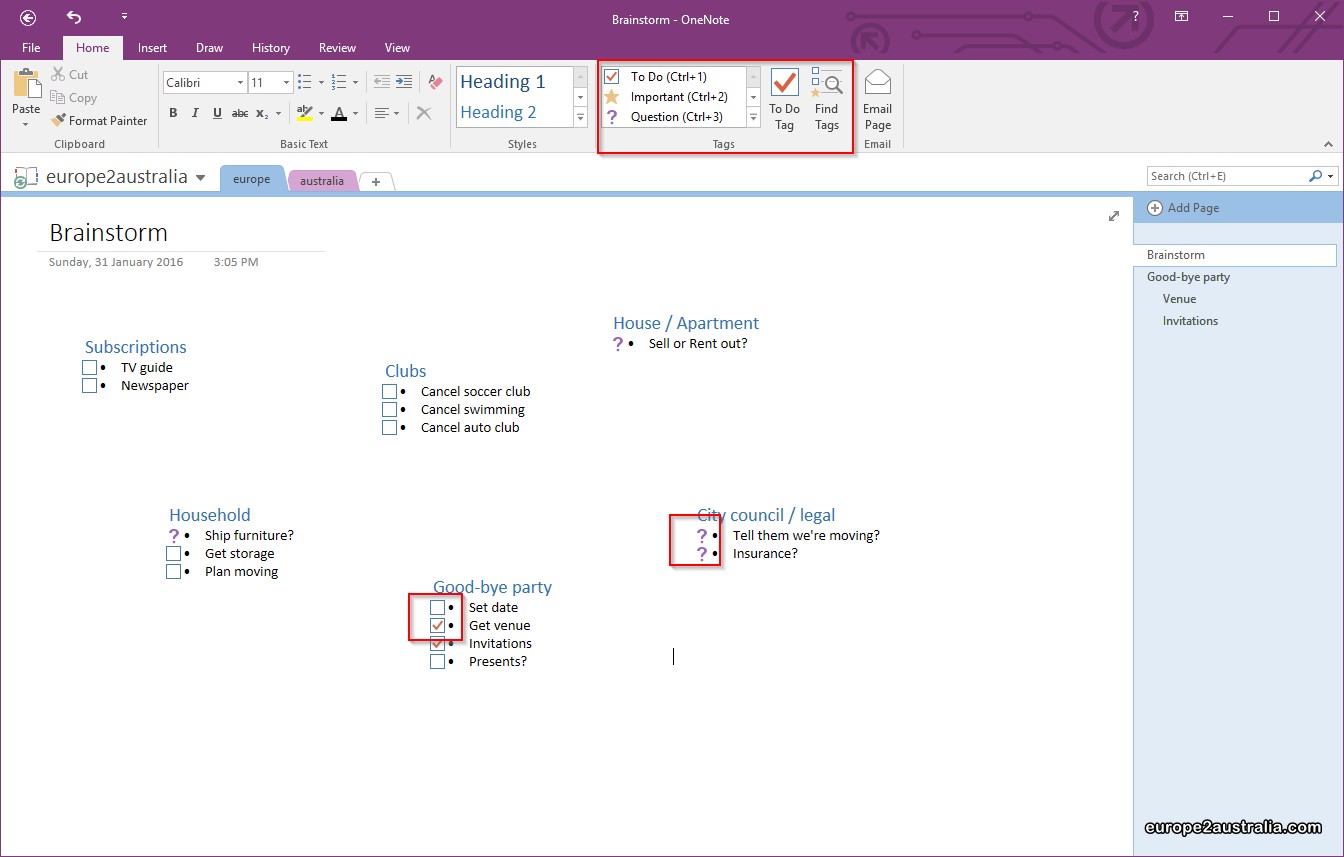 You might notice the boxes and question marks in front of the bullet points. These are called Tags in OneNote. They help structuring you thoughts, as well as making them easy to find. I used the ToDo Tag for ToDo items and the Question Tag for decisions to be made. (Note that you can check a ToDo item, once it is done.)
 Clicking on the Find Tags button will open a side window with all the Tags in all pages in the Notebook. This makes them easy to find again, even if they are buried in some far corner of your file.
You can also filter out the checked ToDo items, giving you an instant To-Do list.
Execution
Now that we we were a bit more clear on what needed to be done, it was time to start doing.
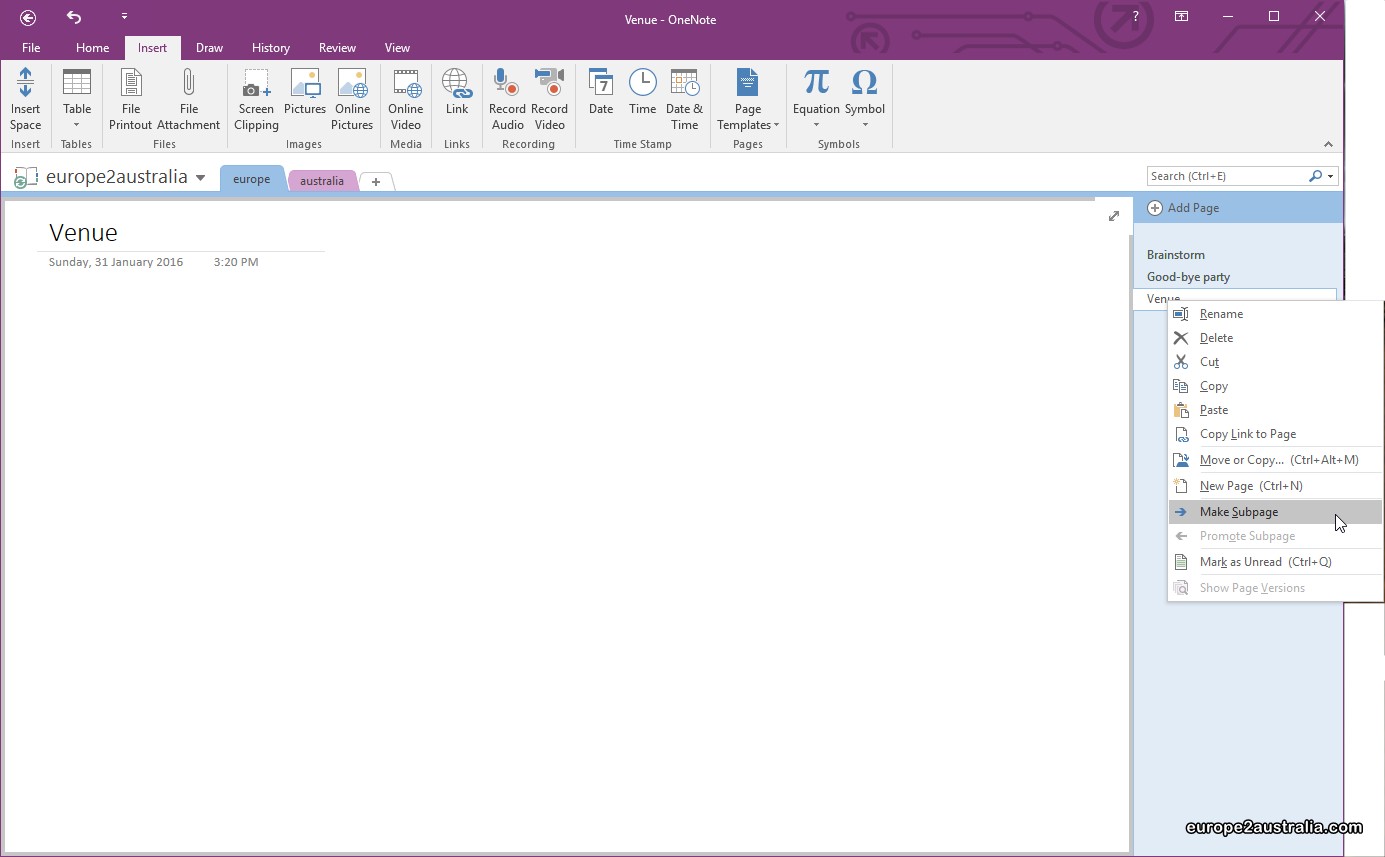 As mentioned above, the tabs offer a level of grouping. The next level down is using the Subpage feature. So for each topic identified in the brainstorm session, I created a page and for each bullet point a subpage. Again, making things a bit more organised.
Research
 Another great feature of OneNote is its ability to take screenshots and paste them directly onto a page. You can also grab websites directly, making research on the internet that much easier.
This is how we found the venue for our good-bye party.
Invitations
 We had the invitations for our good-bye party in two languages and (having a generous employer) I was able to print the very few paper versions at the office. So I needed the pdf at work.
Luckily, you can also attach files to OneNote, effectively placing them on the page. This means they get synchronised across devices and I was able to open the Notebook on my work laptop and easily print from there.
Conclusion
In the end, this is only a small set of the functions offered by OneNote and only one of the many uses it is being put to. However, for what we needed to do, this was the ideal repository.
Feel free to leave a comment if you have used OneNote for your travel / moving plans and what you found most handy feature(s). Or any other tips and tricks. 🙂
Related: Practical tips about moving to Australia
